Table of Contents
macro photography is a technique in which an object appears photographed from very close range. The term derives from its use in the development of photographs. And has since been extended to include pictures that represent close-up detail. This article will discuss why macro photography is so popular, how it’s done, what you need to take good pictures. And whether to buy a dedicated macro lens or not.
READ ALSO: Focusing techniques in DSLR for improving photography skills
A lot of questions can be answered with “it depends”. For example, whether you should buy a dedicated macro lens. Or not would depend on both your skill level and your budget. It could also vary depending on what kind of camera you’re using (DSLR vs Mirrorless). That is, you can get great quality photos with a little bit of research and practice.
An Overview of Macro Photography for Beginners

Beginner macro photography can be done with any camera or lens that you have that can go into “macro” mode. All you need to do is get close enough to the subject. So that the camera will automatically switch from regular “zoomed up” mode to “macro” mode. This usually happens at about 12 inches from the subject. But it can be a little closer or a little further. It’s also not necessary to have a macro lens, all you need is a fixed focal length lens. With nice quality glass so it focuses closely on your subject.
Some cameras (such as Nikon cameras) will display “macro” in the viewfinder. When you are taking a picture at anything less than one foot. For very little money, you can get a cheap set of extension tubes that easily attach to your camera lenses. To extend the length of the lens. Once you get that close, just move your camera back and forth. Until you have the right focus on your subject. Sometimes it’s easier to see this in action through video rather than text. So here is a short video I’ve put together showing how this is done.
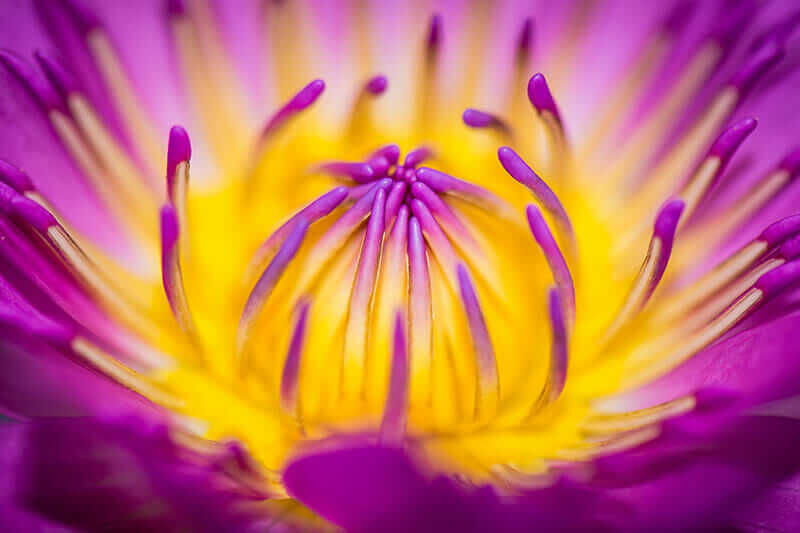
Macro Photography
Now that you have your DSLR or mirrorless camera set up. Let’s explore what you can actually get in terms of macro photos. The quality will vary by camera and lens. But the processing capabilities of the computer will play a big factor in how good your final image is. For example, Canon makes very, very nice lenses for the EOS line of cameras. Likewise, Nikon has equally great optics for its range of cameras. Once I bought a new lens to take pictures with my Nikon D850 it became apparent. That I would have much better results taking pictures with the Nikon D810. Which has much less resolution than the D850 by itself (for comparison’s sake…). What this means is that if you’re interested in getting into macro photography. But aren’t sure if you want to spring for a better camera and lens. The easiest way to get started is to buy extension tubes and start with your existing equipment.
Why Do People Take Macro Photography?
The answer, of course, can be found in the subject matter of macro photography. The fact that you can shoot anything from insects all the way up to flowers Means there is a wide variety of subject material available to you. My favorite example is shooting hummingbirds with my Nikon D850 and 60mm f/2.8 lens. Which has a maximum magnification ratio of 0.41x (0 = normal). This means that at 60mm focal length, I can get very close to the subject without it appearing to be “zoomed in”.
Macro Photography Equipment
Since buying macro photography equipment can be expensive for beginner photographers. I decided to create a “starter kit” of my own for anyone interested in taking good macro shots. On their DSLR or mirrorless camera (there are some exceptions which we will discuss later). All you need is your regular lens (no special lenses are needed, but if you want better pictures then look into getting an actual macro lens if possible). You will also need an adapter ring that extends your focus range. I suggest buying a set of extension tubes. And if possible, get a step-down ring so you can use the same ring for multiple lenses. I use Nikon lenses and my favorite brand of adapters is Fotodiox. You can find them on Amazon and B&H also sells them for less money than Amazon at the time of writing this article.
CHECK OUT ALSO: How to merge clips in Adobe Premiere Pro
The Best Macro Photography Lenses
If you are looking to get into macro photography, please please PLEASE do not feel like you need an expensive macro lens to take good pictures if you don’t have the budget for one yet. If you want to start with one, I will say that they are great. Nikon makes some of the best lenses for macro photography on the market, but there are literally tons of other companies that make very high-quality lenses as well. It’s really up to your personal preference and what you value most in a lens.
Macro Photography Lens Options
If your budget is pretty low, here are some good entry-level lenses you can consider:
The Nikon 50mm f/1.8G AF-S is a great DSLR lens for beginners looking to get into macro photography. It’s less expensive than its Canon equivalent but has the same build quality and it’s slightly faster at f/1.8 which means more light gets in for good images at longer distances. The 50mm lens comes with a Macro Mode that can be found on the Menu tab. The maximum magnification ratio of 50mm is 0.26x which is on the low end for macro lenses. But still good enough for some pretty great images. It’s also a great lens to use on a full-frame camera as a general-purpose lens for everyday use.
The Canon EF-S 60mm f/2.8 Macro USM Lens is another very popular option for those using Canon DSLR cameras. A cheaper alternative from Canon would be the EF 50mm f/2.5 Compact Macro Lens as well as their older version that only focuses as close as 1:1 vs 1:1.4.
Tamron is also a very popular brand of lenses that are great for macro photography because if their affordable prices. Tamron makes some super compact lenses which are great if you are looking to do macro photography in tight places. Here are the three lenses I would recommend for you to consider:
Macro Photography Tips

Here are some basic tips when shooting macro photography with your DSLR or mirrorless camera:
– If you’re taking pictures of flowers, insects, or any other type of small subject matter that isn’t moving, then it’s fine to be lazy in this regard. However, if you’re taking pictures of birds, hummingbirds, or any other fast-moving subject then you need to be careful.
I have a mount that I use to attach my camera to a mini-tripod called the MeFoto Backpacker Air Travel Tripod. The nice thing about this tripod is that it folds up small enough so I can take it with me wherever I go. Without having to worry about it being too big or bulky. If your camera doesn’t have image stabilization built-in then you are going to be limited. By how low your shutter speed can go before blurring will start showing up in your final image (the longer the FL of the lens the more likely this will happen).
While taking these types of pictures it’s very important to use a shutter speed fast enough. So that blur from movement won’t become an issue, otherwise, you’ll have to lower the magnification ratio by using a closer focal length. The easiest way to do this is by getting close enough so that you can get the image in focus with a longer focal length. For example, if you’re trying to take a picture of a bird flying around then using a longer focal length will help you get the image in focus because it will be easier for your camera to focus on the subject at long distances because it’s going slower than if the bird was zipping around near you.
Focus Stacking

– If your camera doesn’t have much depth-of-field, or if you’d like to increase your depth of field even more after taking an image, then you can do this by taking multiple images and combining them in post-production. As mentioned previously there are many ways to do this now with various programs, but Adobe Lightroom is my favorite. Just make sure to open the images in the same program and save them in order (so you won’t forget) if the program supports it.
A lot of people ask me about this and it’s always been difficult to explain in words, so I decided to make a video on this topic which you can watch here.
Note: This is a more advanced technique that requires some equipment which you can learn about in the video.
– This is a great method for getting really cool macro images. A lot of people ask me about this and it’s always been difficult to explain in words, so I decided to make a video on this topic which you can watch here. Note: This is a more advanced technique that requires some equipment which you can learn about in the video. Use a Macro Lens – If you’re shooting macro images then it’s important that the focal length of your lens is sufficient (at least 50mm and up). This is because you’ll want to maintain a large depth-of-field and therefore the more light-gathering capacity of the lens will play a key role in letting you take sharp images.
Conclusion
As you can see, this is an extremely versatile subject matter and there are many ways to get great macro photos with your DSLR or mirrorless camera. My hope is that I’ve been able to give you a good overview of this topic and will be able to point you in the right direction if you’re looking for some solid examples of macro photography. Thank you, and happy filming!
Note: The most important thing with macro photography is practice and patience. If it took me this long to get decent shots then it will most likely take someone else a lot longer. I usually start out with my camera on Manual mode with the aperture wide open (f/3.5 or f/4) even when it’s not really necessary, but more about this at the beginning of the video.
1 thought on “Macro Photography- Made Easy”