
Table of Contents
In this article we will explain how to curve text in Photoshop. In a situation where you are performing on a badge, poster or the other compositions in Photoshop. And might like to curve a couple of texts at a time, photoshop offers several ways to do this. But counting on how you’ll use it and therefore the curvature you would like to offer to your text.
READ ALSO: How to Find the best photographer in your Area.
Some methods are better than others. And here we would be able to help with a few steps to curve text in Photoshop. Providing you with varieties to choose from.
THREE METHODS TO CURVE A TEXT IN PHOTOSHOP
METHOD 1
STEP 1
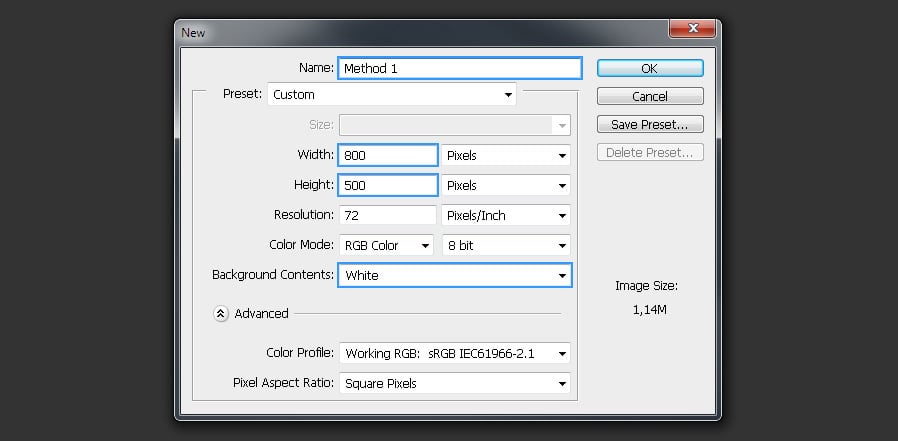
First of all: Open Photoshop, on the top left, immediately after the photoshop icon. You will see File, click on File >
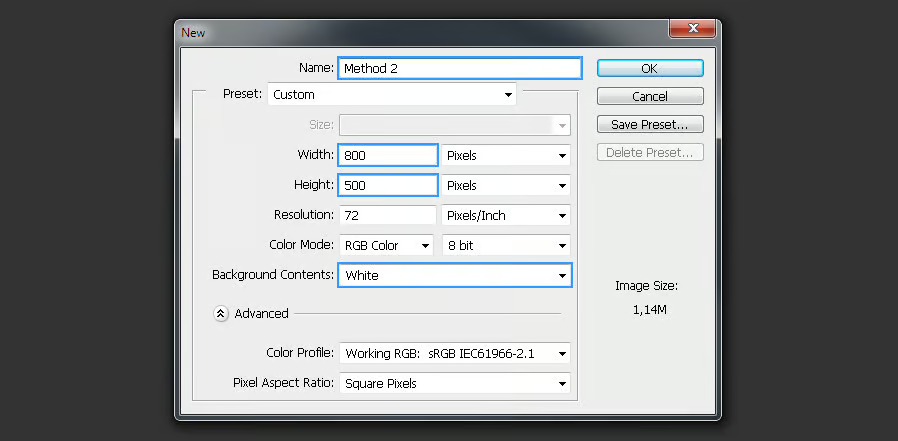
select New. make sure to rename the document name as “Method 1”, a Width of 800 px, a Height of 500 px and select “White” for the Background Contents. Click OK.
STEP 2
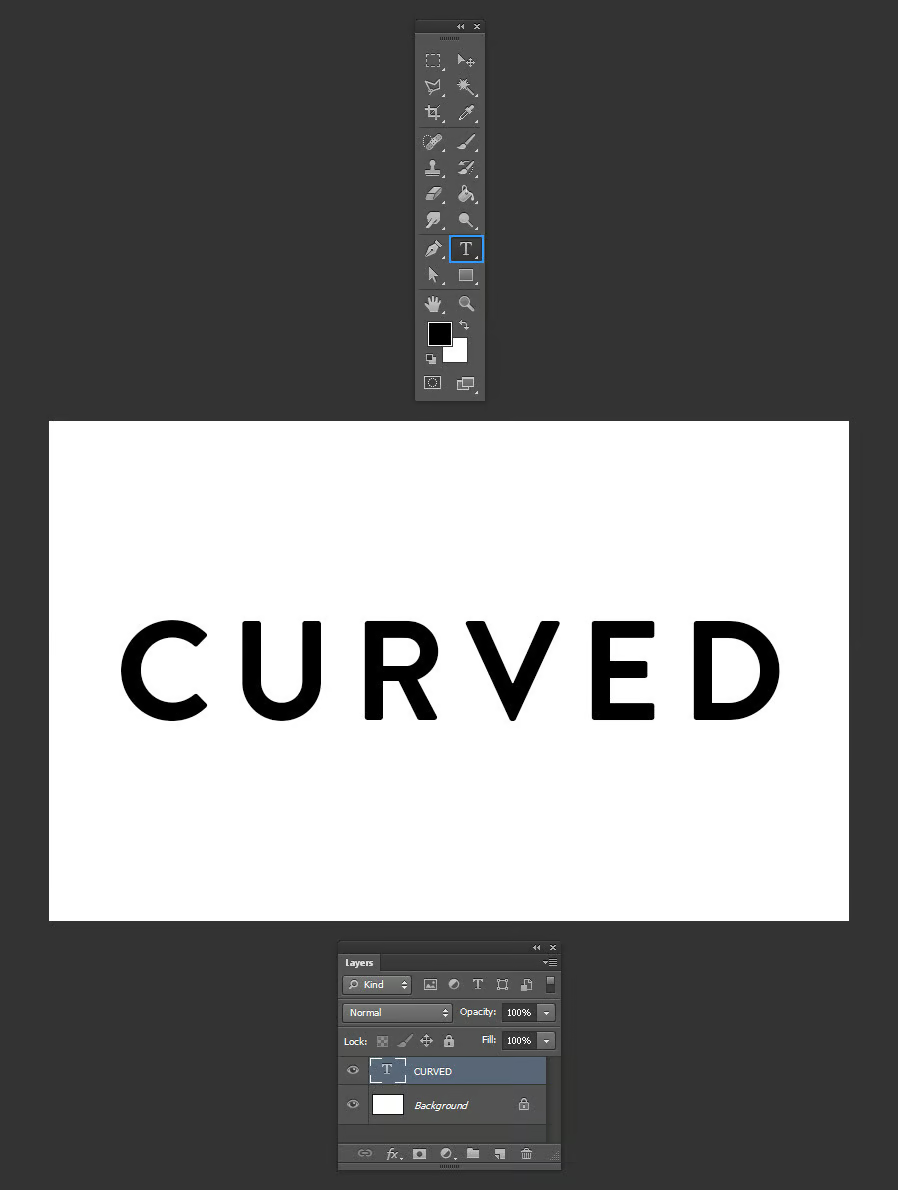
Select the Text tool on photoshop by clicking (T) on your keyboard, which is a shortcut for selecting Text tool, and type your text.
STEP 3
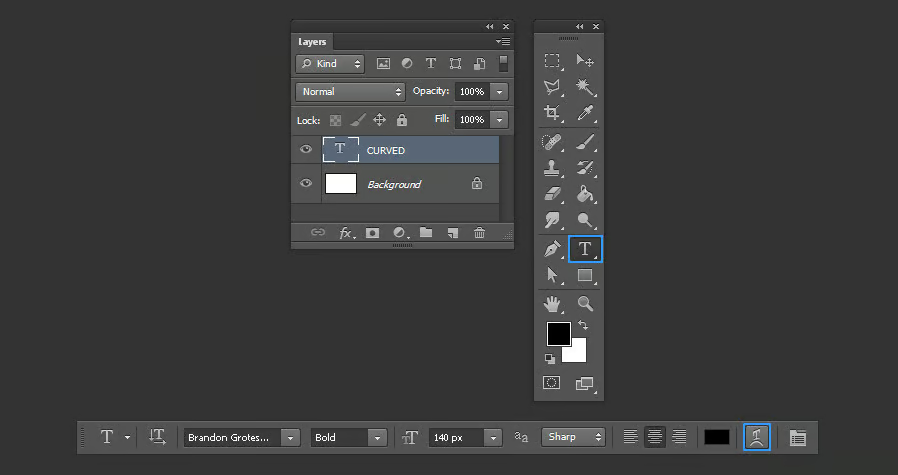
Making sure the text layer is selected and Type tool (T) active, click on the “Create warped text” icon which is located in the toolbar.
STEP 4
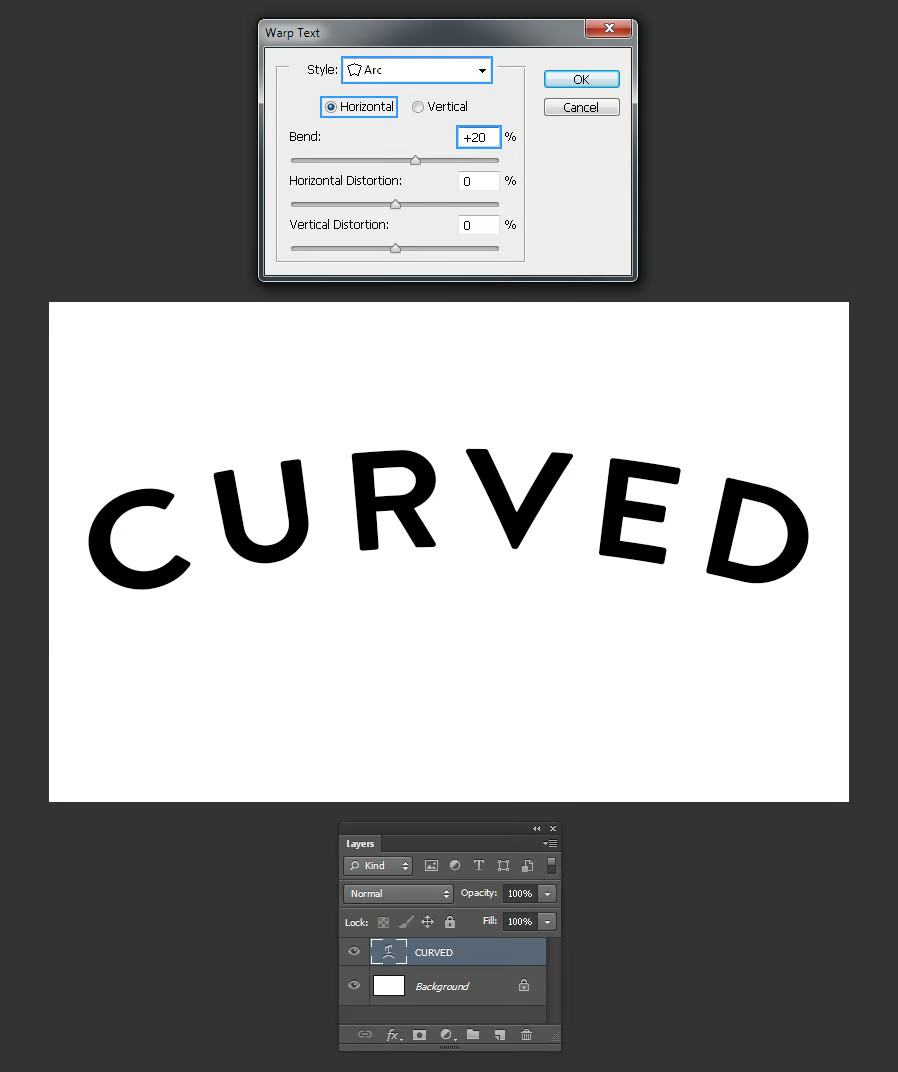
While in the Warp Text window, in the STYLE box: select the “Arc”, make sure the Horizontal option is checked and set the Bend value to +20% and then Click OK
ALSO CHECK OUT: HOW TO DRAW A SKULL
METHOD 2
STEP 1
First of all: Open Photoshop, on the top left, immediately after the photoshop icon, you will see File, click on File >
select New. make sure to rename the document name as “Method 1”, a Width of 800 px, a Height of 500 px and select “White” for the Background Contents. Click OK.
STEP 2
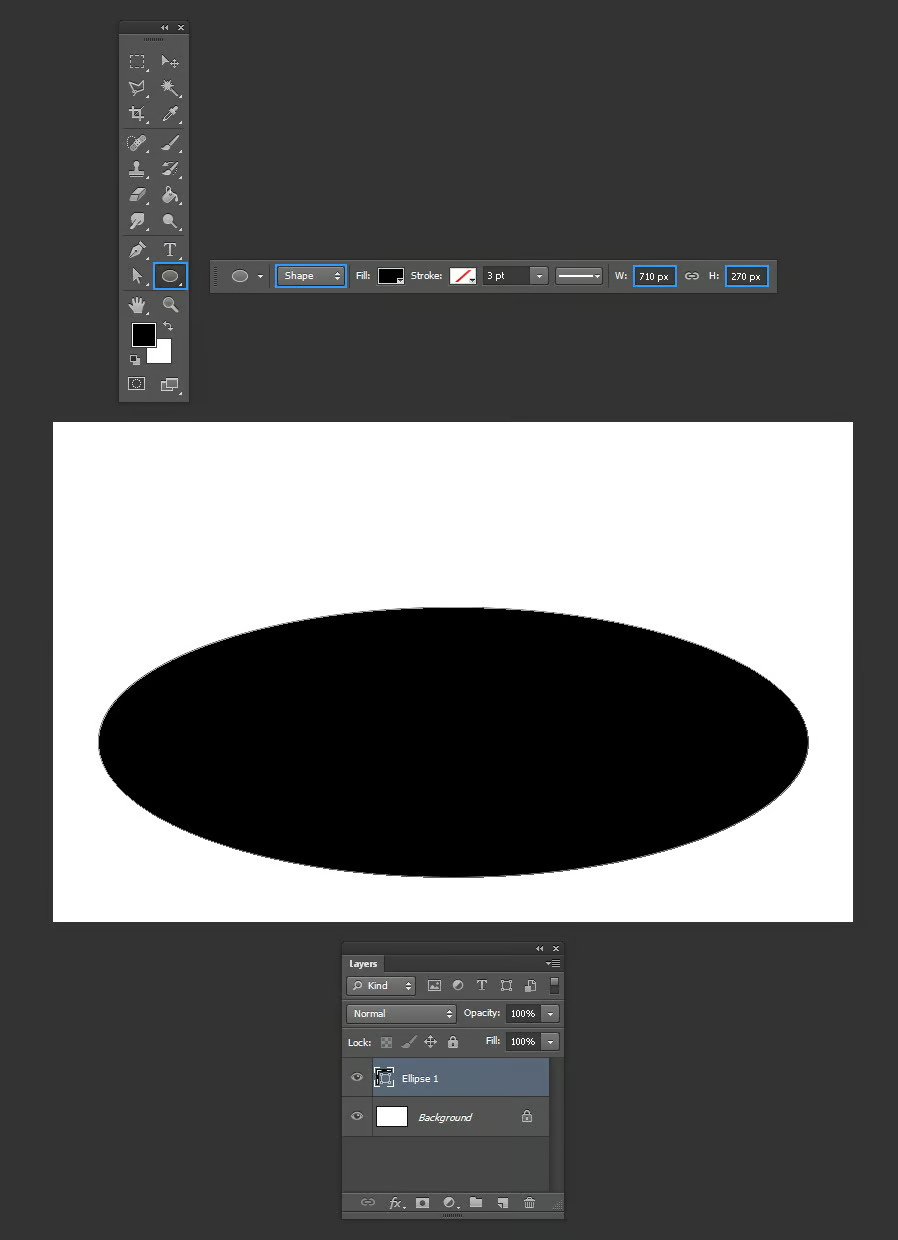
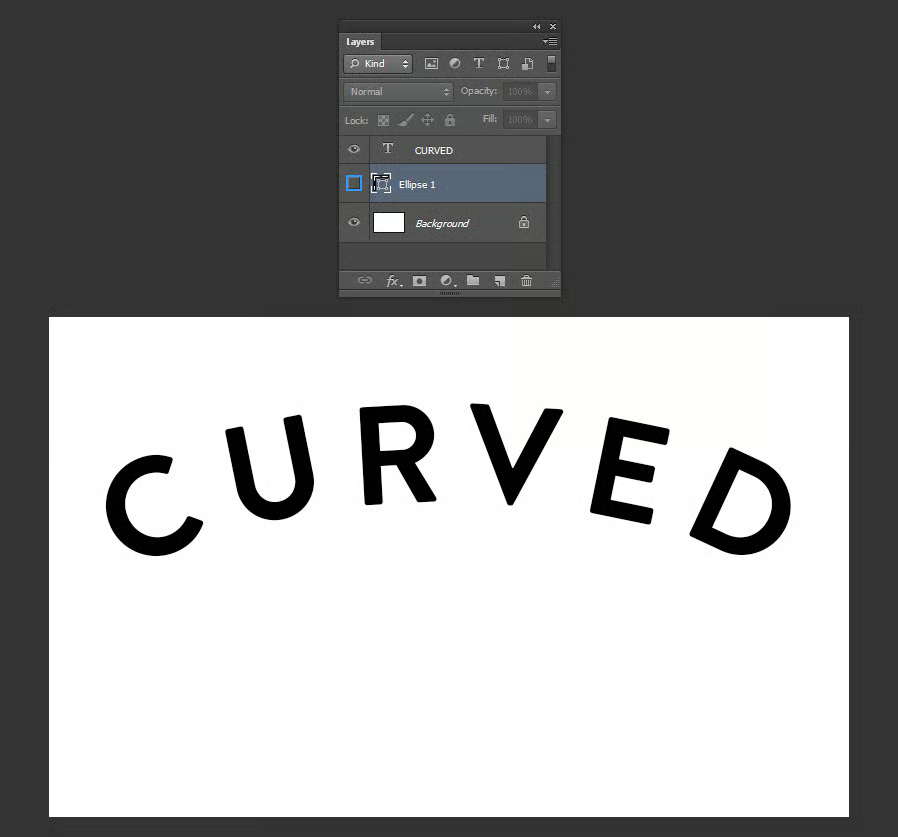
It is necessary at this point to Select the Ellipse tool with the shortcut (U), it can be spotted along side other shapes like the Rectangular Tool, Rounded rectangle tool, polygonal, and others. Make sure the “Shape” mode is selected in the toolbar and then draw an ellipse of 710 px x 270 px.
STEP 3
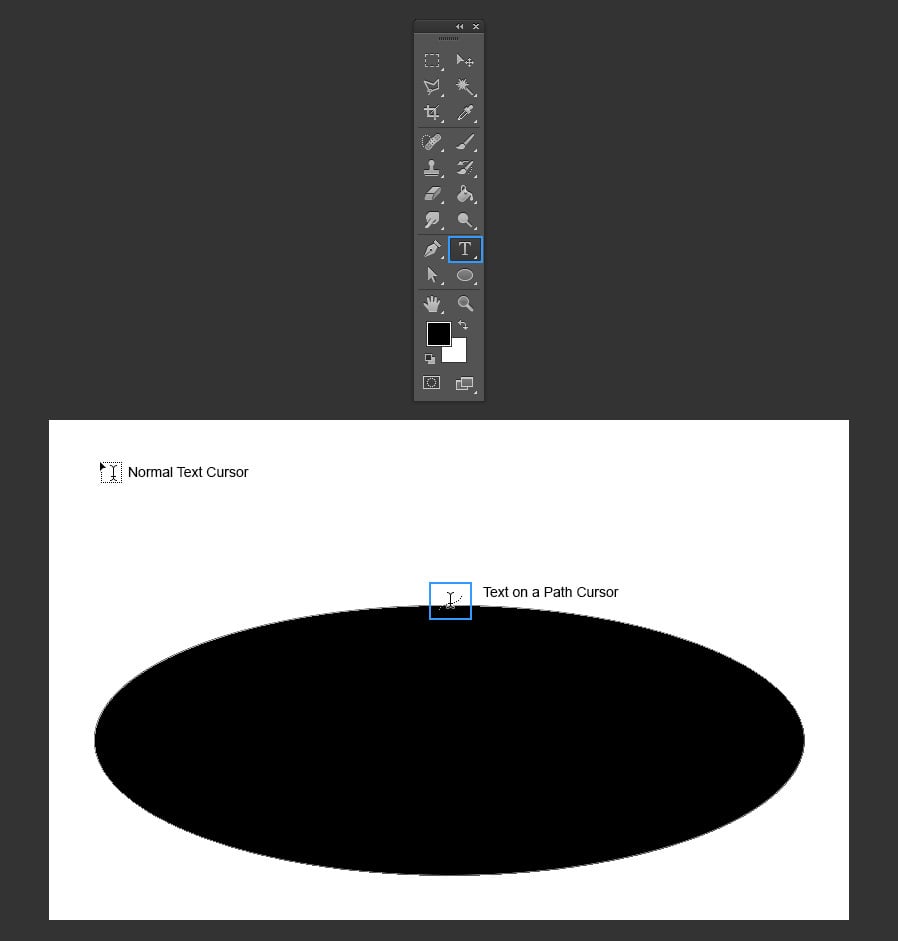
Select the Text tool by clicking (T) on your keyboard and click by pressing down the left mouse or left clicking on the edge of the ellipse when you see the “Text cursor” then change to the “Text on a Path” cursor, simply leading us to the next step.
STEP 4
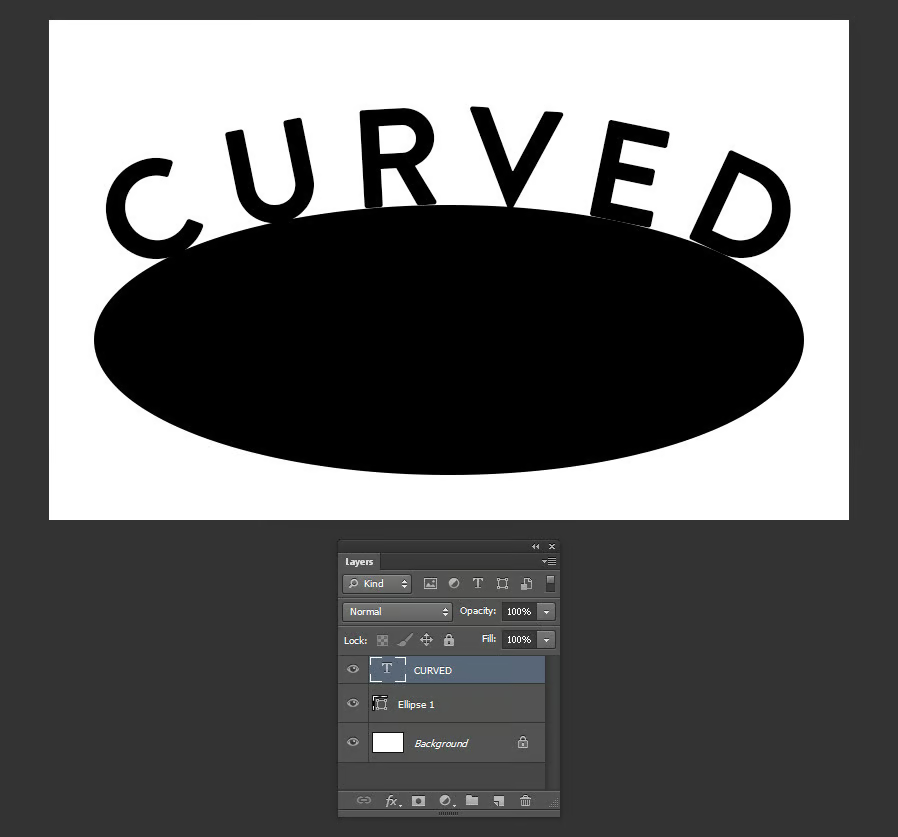
Type the text you will love to use.
STEP 5
Once you done typing the Text All you need do is to simply click on the eye. When the eye is deactivated, it hides that layer, do this to hide the ellipse layer. The eye sign is located next to the layer name.
METHOD 3
STEP 1
First Open Photoshop, on the top left, immediately after the photoshop icon, you will see File, click File >
select New. make sure to rename the document as “Method 1”, a Width of 800 px, a Height of 500 px and select “White” for the Background Contents. Click OK.

STEP 2
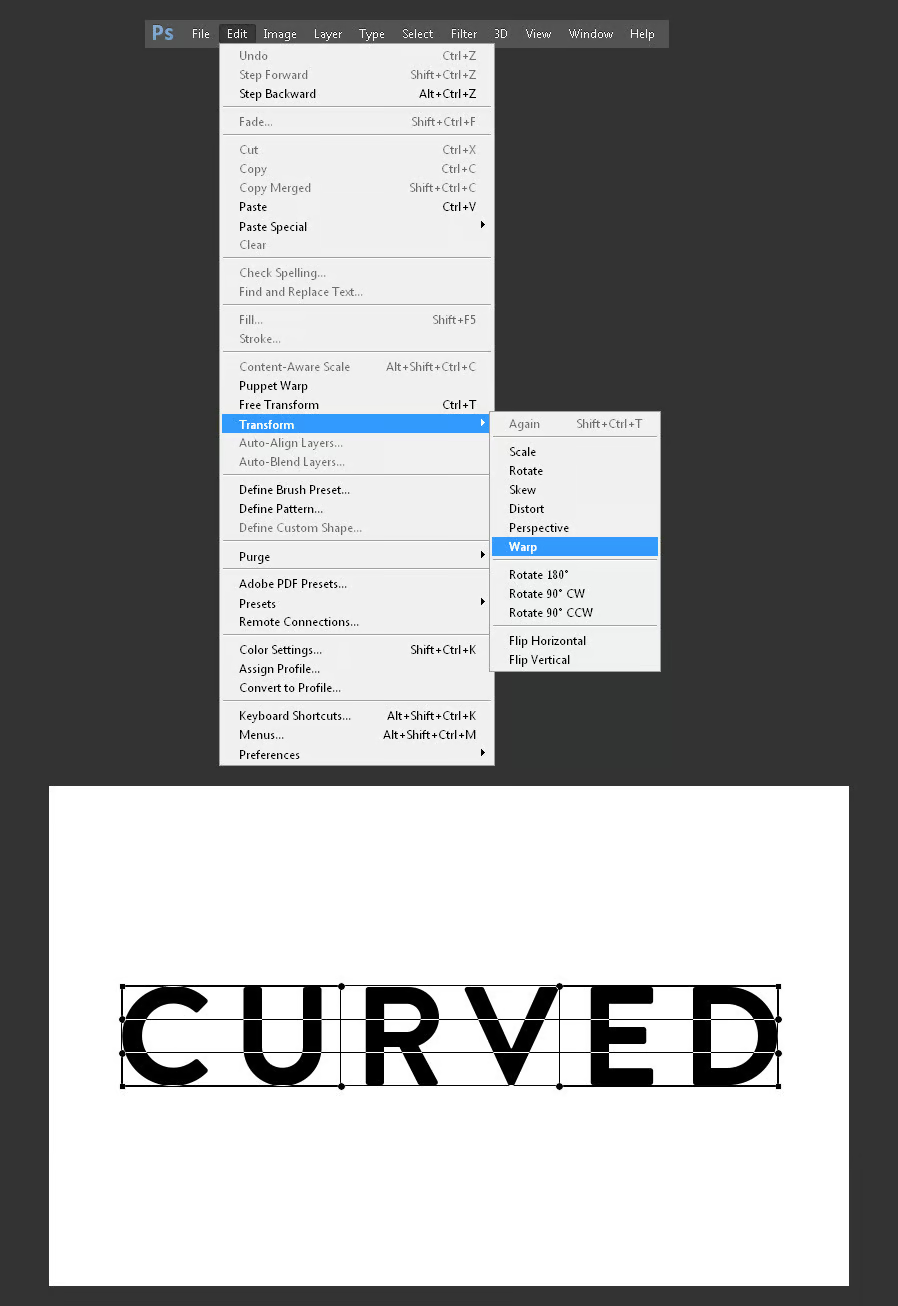
Select the Text tool on photoshop by clicking (T), which is a shortcut for selecting Text tool, and type your text.

STEP 3
While the text layer stays selected click on > Layer, under which you click > Smart Objects > under which also you click >Convert to Smart Object.

STEP 4
Click on Edit > Transform > Warp
STEP 5
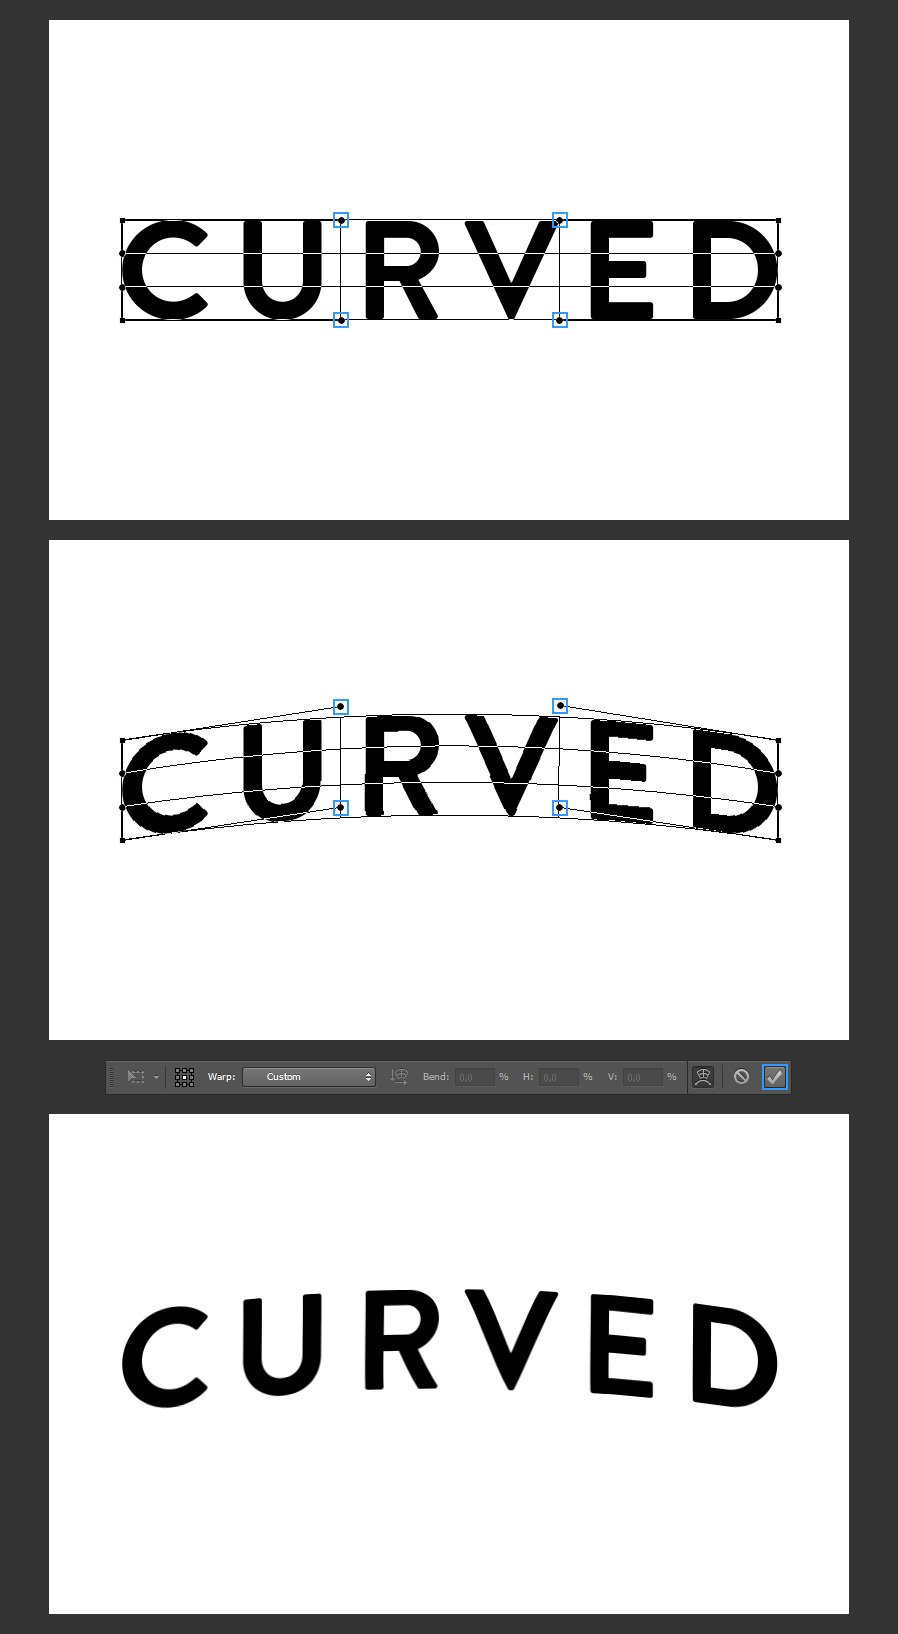
You will need to Click and drag over the anchor points of the warp grid to have the text selected. Once you are done doing so, click the commit transform icon in the toolbar.
Great ideas shared !!..I can say I learnt something tangible.
Wow!! This is lovely
Oh wow! Thanks for sharing!