Table of Contents
Sometimes you need to know how to draw a braid. There are many times it’s easier to practice drawing the braids of your favorite models, actors, or friends in real life. What do you need in order to draw the perfect braid? You just need a few simple things that are found in any artist toolbox.
You will find probably already have most of these things because they’re easy to find just about anywhere! So if you’re ready for your next project, here is an article on how to draw a braid!

What Software can be used to draw braids?
There are many types of Software used to draw braids. The most common way is using the pro version of Adobe Photoshop. Using this pro version, you can create your own braids and use them on will or for business purposes.
If you’re more interested in how to draw braids then you should consider purchasing the Adobe Photoshop pro version. You’ll be able to start drawing real braids on your computer.
This Software is used to draw braids of models, celebrities, and everyday people. It’s a pro product that can be purchased online at the Adobe Store.
If you want to unlock more advanced features for this Software, there’s Photoshop Elements which can be purchased at a low cost and it’s also used to draw high quality braids on your computer.
Another popular program that is used to create braids is Microsoft Visio. Visio can be purchased in a full version and some exclusive versions that only give it the Visio braid block tool.
HOW TO DRAW BRAIDS; with Adobe Photoshop pro version
This is the Software that I will be using to explain how to draw braids. When I first started using this tool, it was all very confusing! But, now after so many hours of practice, I can create anything with it! It’s really easy once you understand what you’re doing.

I will walk you through the steps now so you can be drawing your own braids in no time at all! Part of the beauty of this Software is all the shapes and designs that are already pre made for you to use. This makes it very easy because there are already step by step instructions available for whatever design or shape that captivates your interest.
Ok, here we go!
1: First step: select the drawing tool that is required to draw the braid and select the desired color. Then click and drag your mouse across the screen to make a small line. This will be used as a guide line, so do NOT take it away until you’re done! If you need to make any changes or want to move it around, select it and move your mouse. You can even change the line thickness if needed.
2: Next, select the pen in the toolbar. The default for this Software is a pen that is very thin, but you can change it to whatever you want it to be. I prefer using the normal pen because I like the way it works, but if you want something different, make sure to select it in your options.
3: You’ll see small shapes around the approximate location of where your braid will be placed when you’re done! These shapes can be used like guides to make sure it fits exactly where you want it. If they don’t look right or you need to move them around, just press and hold on them and move them by using your arrow keys.
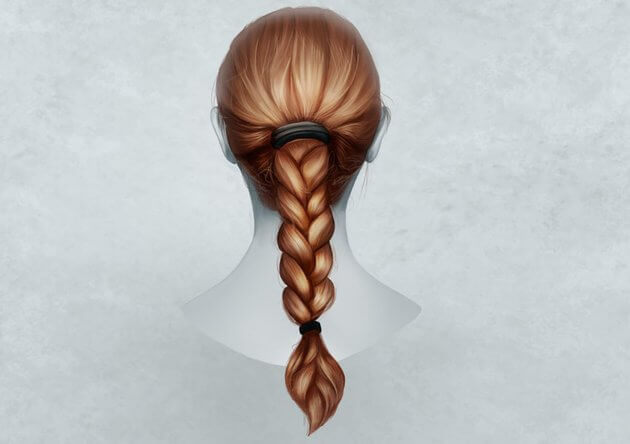
4: Now you want to choose which kind of braid you’d like to use to draw your braid. In this case, I will be using a fishtail braid. This is the path that I will be using for my braid.
5: Next, we’re going to create a guide line! Click and drag your mouse in the same shape (or little bigger) that you would like your own braid to look like. Be sure to make the shape the same size as your guide line, otherwise it may look wonky!
6: Next, select the braid shape and drop it down, by pressing Control/Command + D (Mac) or Control/Command + D (PC), in order to create a second line. This is a different way of creating a braid besides just creating a straight line. This is called a fishtail line. You have two choices available to you, either going longer or shorter depending on if you want more or less hair into your braid.
7: Now that you have your guide lines, you will need to use the pen to create your braid lines. Go ahead and click on the pen again if you haven’t already. It’s best to go ahead and make the braid line start at the beginning of the 2nd line (the one with a little more distance between them). To make it shorter or longer, just use your arrow keys.
8: Next step is to create a box around where you’ll place your braid! This step can be confusing, but I’m going to walk you through it now. First select the shape tool by clicking on it in your toolbar (it looks like an eye dropper).
9: After you select the shape tool, go ahead and make the shape the same size as the braid you want to place.
10: Now it’s time to either subtract or add the box! First, subtract by clicking on your pen (you can click anywhere on your screen). This option will be available for all shapes except if you press Control + D (Mac) or Control + D (PC), you can see that “subtract” is not an option. You have to use the same key as the squared box that was added.
11: Next, add the rectangle shape by clicking your pen again. If you want to make the length smaller or larger, just press and hold on your mouse and move your mouse up or down. You can change it to whatever size you like!
12: I feel like the result is not quite what I expected. But if you look closely, it’s still very similar to fishtail braids. Here’s what I ended up with (it’s kind of hard to tell since my braid isn’t that long yet!).
Now let’s talk about how to draw braids for more than one person! For this project, I’ve decided that I will be creating a couple of braid designs.
1: First step is to make the shape that will be placed within the braid. You can either use the basic shape or you can use a freeform shape tool by clicking on it in your toolbar.
2: Next, select the pencil tool by clicking on it in your toolbar. Then click and drag across your screen to form a small box. This will be placed within your braid! It doesn’t have to be exact, just roughly placed the same size as where you want it to go through both rectangles.
3: Now select the rectangle tool. Then cut out the same size of rectangles you used for your braid! You can do this by pressing the lowercase letter O on your keyboard. You can also use the freeform shape tool to make it match.
After doing this, I’ve decided that it would be easier if I drew my braids in Microsoft Visio program because it’s easier to draw braid lines that are straight and perfectly even. This is because it’s a bit easier to draw the line that will match the other braid if it’s perfectly straight.
STEP 2
1: First, go to File > New > Template. Then select the Braid.vwt sub-template and click OK. This will open up your new template in Visio!
2: Next, go to Tools > Braid…
3: You’ll see 3 different braid shapes that are already pre made for you! Just select what you want and then click OK. The image below shows the options available for this type of braid.
4: Voila! Your very own braid template and the options to customize it as you wish! All your friends will be jealous of you now. HAHA…
I hope this tutorial was helpful, Regards Vivien Chinos
If you’re serious about learning how to draw braids, then go with Adobe Photoshop pro version. This Software is used by the professionals in the braid drawing industry.