Table of Contents
ORIGIN OF LIGHT PAINTING
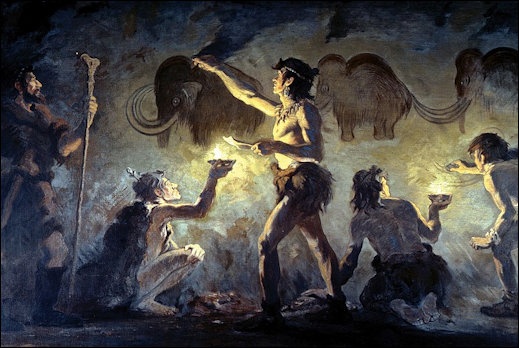
This form of art can be found as far back as 1300 B.C. Where cavemen would draw pictures on caves with instruments. That could project light from their hands or from a nearby fire. In this article, we will be learning all you need to know about light painting. And how to achieve light painting in Photoshop.
Art has been around for a long time and has independently developed in different countries and cultures. It is the process of creating works of art, which appeal to an intellectual or emotional response in its audience. Art forms include graphic art, music, film, and photography. Decorative arts (jewelry, sculpture), theatre (dramatic arts like plays or musicals), and architecture ( building or designing).
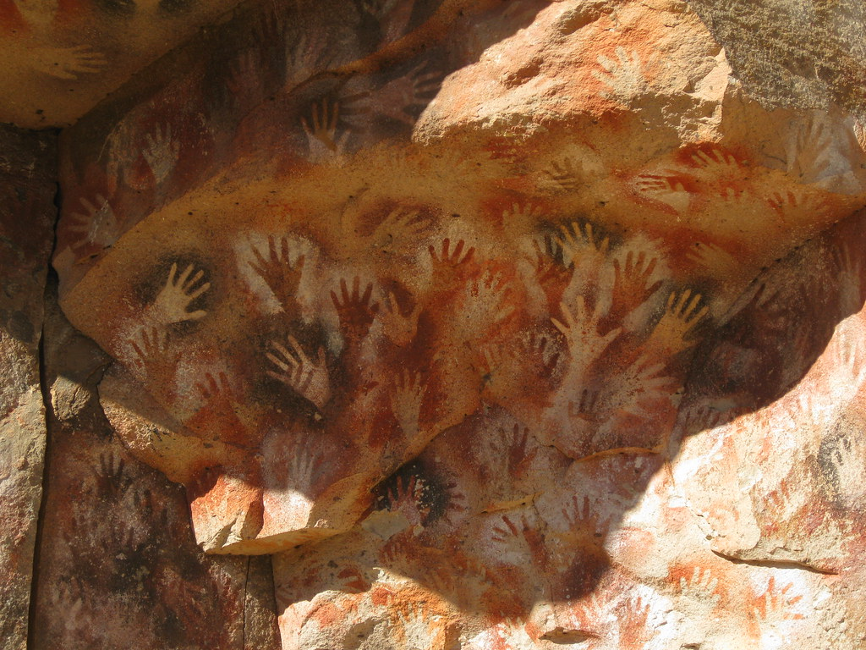
The oldest known form of art is cave painting. This form of art is made by using pigments on cave walls by using some tools like sticks. And fingers and drawing some creatures and animals etc.
The earliest known examples of light painting were painted on the ceilings of Egyptian tombs. This form of art was made by using a method called “bond art”. Where craftsmen daub paint on the ceiling. Using a mixture of gum and egg white and then creating designs with a variety of tools. Like the point of an arrow, a sharp rock, or a knife. Some examples from King Tutankhamun’s tomb are seen below.
King Tutankhamun’s Tomb, Luxor
The other form of art that was created by the Egyptians was statuettes. People were sculpted in stone or wood and then painted. The Egyptian people also made other works of art. Like small statues of animals, bread, bread rolls, fish, cats, dogs, etc.
The next major form of art was cave paintings which were created long before the Egyptians. When the Spanish conquistadors came to Mexico in 1519 they found extremely detailed paintings on cave walls. The paintings consisted of Nahuatl Indian figures. Including gods and goddesses wearing amazing feathered headdresses and designs with fantastic colors on their bodies. Inca art is also very similar to cave paintings.
The second major form of art was pottery. This type of art is located by using a process called “pottery”. Where people were able to make pottery out of clay. And then make a design on it with a variety of tools like the point of an arrow. The tip from a sharp rock, or from something like a knife. Pottery was also used as part of ceremonies where people would use these types of artifacts. As decoration for decorations for altars and vases.
The third major form of art that was used during the early years was carving. This form of art was created by using stone or wood. And creating different designs with the point of an arrow, sharp rock, or something like a knife. Carving is considered as one of the oldest forms of art out there.
The next major form of art was weaving which is considered as one of the oldest forms on its own. During pre-colonial times, people were able to create different designs by using “weaving”. A lot of them have become famous especially those that are done by using animals with interesting designs for clothing.
READ ALSO: HOW TO DRAW A CARTOON CHARACTER
LIGHT PAINTING PHOTOGRAPHY
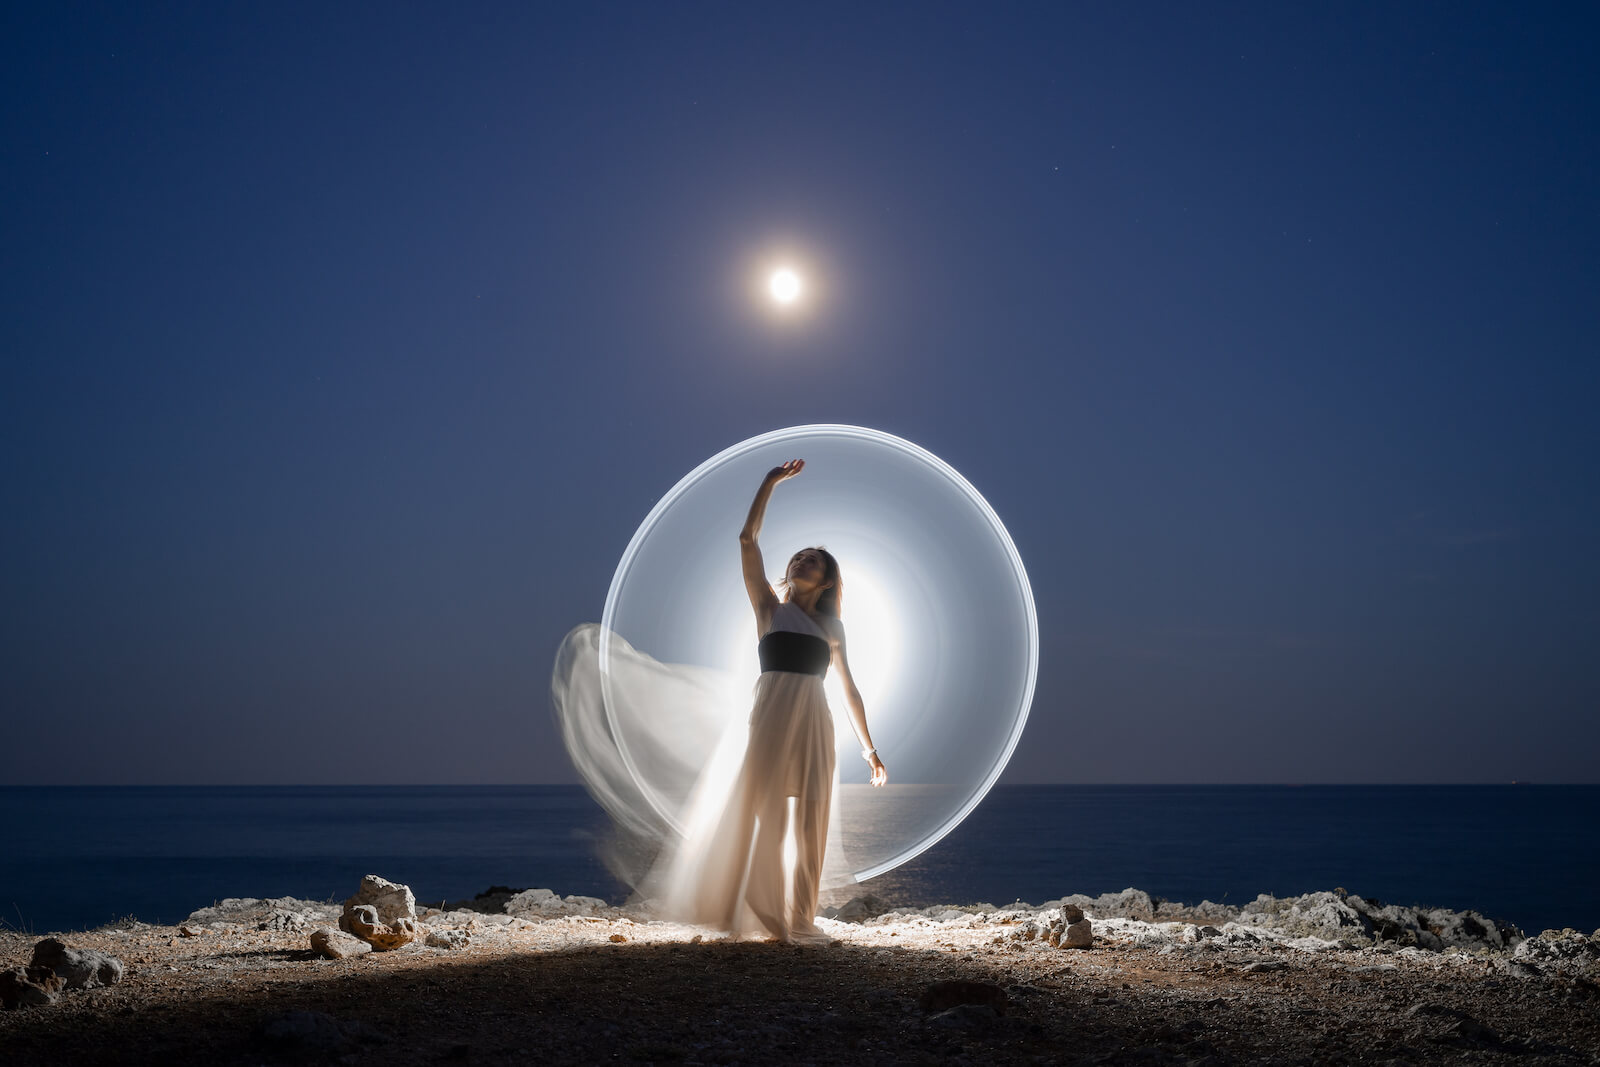
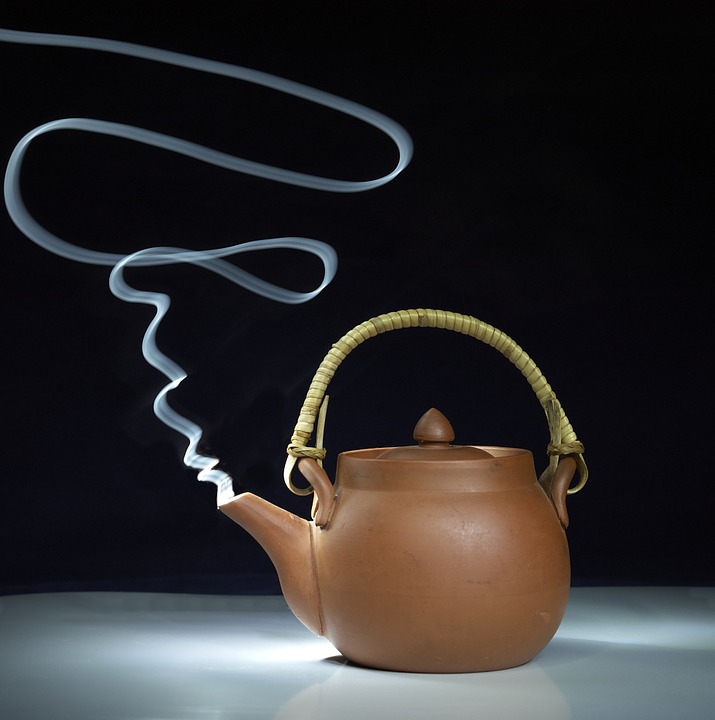
Light painting is a type of photography in which an image is captured. By projecting a light source from the photographer’s hand or other location and moving it around to create long glowing lines.

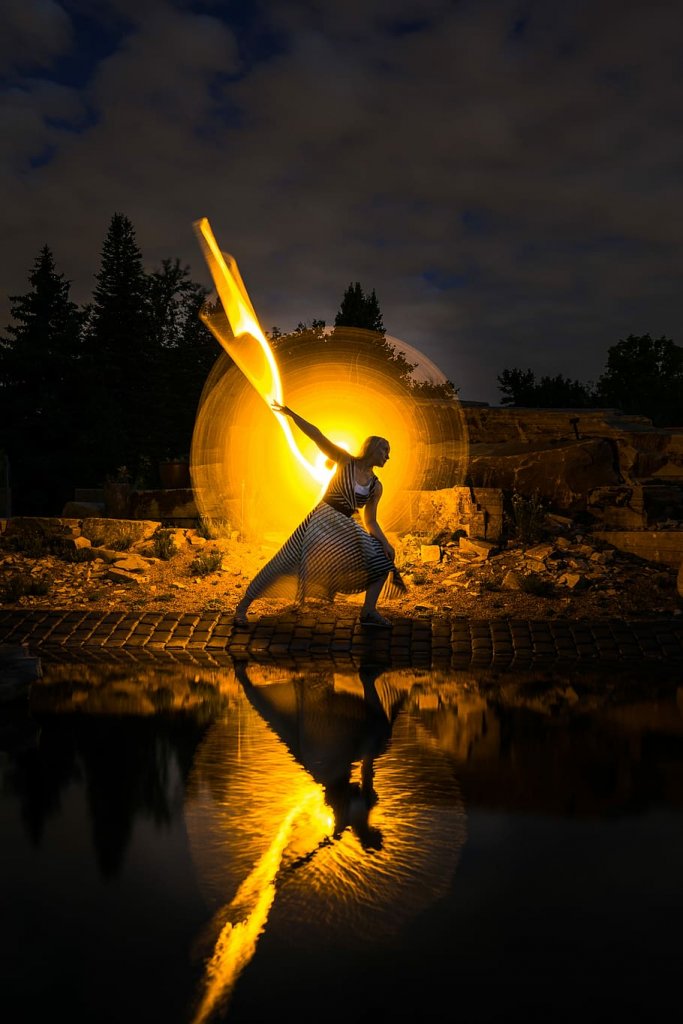
The resulting photographs can be beautiful or mysterious. Depending on how the light interacts with the scene and how you move your camera. There are different ways that artists use light painting to convey their sense of style and mood. Creating surreal images, abstract patterns, and brush strokes. Lighting is also one of the many styles that refers to overall production techniques. Such as film stock choice and cinematic tones.
CHECK OUT ALSO: All you need to know about a: Lapel Microphone
An example of light painting is when you take a video camera. And hold it in your hand with the lens pointing toward the ground and then turn out the lights. And wave the entire time that you are filming. This would look cool if played back on a computer with something playing through your speakers. This one is ideal to make abstract art, but there are many more ways to use light painting. Before you get started, you should find a nice, flat surface where you would like to light paint. You should also light paint in a well-lit room. And use the exact same kind of lighting for all of your photos.
some places to get great lighting include:
-the bottom of a pool during the day; we used this idea at my school and we got good results by using two floodlights and aiming them down to make a big sphere of light, then we put what looked like a floodlight up above us with the camera on it.
-using two flashlights (the color you like/what you like) to make patterns; this technique is perfect for making abstract art.
-making the room darker and using black lights, this should make great results if you are an artist.
-use a flashlight by switching it on and off quickly (whole second off / whole second on); with the motion of your hand; once again, this should make great results by playing them back on a computer or watching them with real-time effects.
-creating a pattern on a surface with a pinhole camera, this can be cool to show to your friends.
-use a wooden spoon with WD-40 and some paint thinner for some cool effects; you can also use some dirt from outside, saran wrap, tape it to a plate. And use some paint thinner as you paint on it.
-using an iPod or digital camera to capture images as you turn it around or wave it around. This method will make great abstract art.
After you have captured your light painting images from handheld photography from anywhere in the room. Don’t move the lights and set them up how you want them without any special effects. You can then use a variety of picture editing programs to turn your photo into an incredible work of art. You can use a program like adobe photoshop, lightroom.
This is a form of abstract art and is effective when used with a projector. A projector is basically a machine that flashes different images onto the screen in quick succession. The most common projector right now is called “movies”. They are usually accompanied by the word “movie” as in Netflix movies or movies on iTunes.
LIGHT PAINTING IN PHOTOSHOP
You’ve thought about doing light painting in Photoshop for months now. But every time you sit down to create something beautiful out of this concept. It turns into a frustrating process that leaves you wondering why bother exploring this at all. We’ve all been there, so don’t feel bad. I’m here to help you get started so you can start exploring the world of light painting.
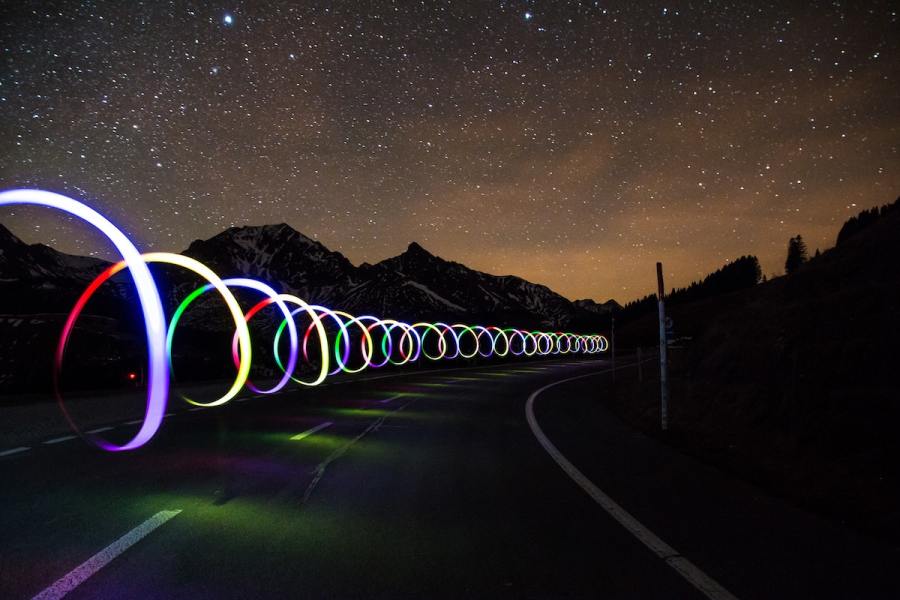
Light painting is a viral technique that uses long exposures to create amazing images using light trails and other tools. This technique is great for anyone interested in photography, digital art, or who just wants to create something cool. It requires patience, but that’s the only requirement! Read on for some tips and tricks for getting started with light painting in Photoshop!
BASIC TOOLS YOU’LL NEED
1.) Your camera – Duh! The most important piece of equipment is actually your camera, luckily they’re pretty inexpensive these days. Make sure you have a tripod or other stability setup if you’re going to be shooting longer than about 10 seconds. I know, this sounds ridiculous, but trust me, you’ll get faster at it with practice.
2.) Your computer – You’ll need to be able to transfer your images from your camera to your computer for editing. The best way to do this is using a card reader and a program like Adobe Bridge (here’s a beginner’s guide) or the free Adobe Camera Raw. This is also known as RAW which stands for “unprocessed” image data. The RAW format gives you the ability to edit your images without needing Photoshop or any other editing software installed on your computer!
- Your software of choice – I HIGHLY recommend Photoshop. It’s the most popular image editing program on the planet, and it’s free (yes, FOR REAL!) to download. Adobe has all sorts of other programs including Photoshop Lightroom (for organizing your photos), Photoshop Elements (for beginners) and Photoshop Mix (which is similar to Photoshop but with more advanced features). There are plenty of great tutorials found on YouTube if you need help learning how to use these programs properly.
INTRO TO LIGHT PAINTING
1.) You’ll Need to be in manual mode. This is crucial since we’re going to control all aspects of the photograph.
2.) Set your camera settings as follows:
- Aperture priority mode (stop down as much as possible to keep your shutter open longer)
- High ISO, I recommend staying above 400 for quality reasons. You can use lower ISO if you have a tripod to keep it from being blurry from camera shake! If your camera doesn’t have a manual shutter speed, you can use a program like this one to set your shutter speed manually. Your settings may look similar to this:
3.) The rest is up to you! Try experimenting with different colored objects and different ways to create paths of light. Here are some great examples from Digital Camera World:
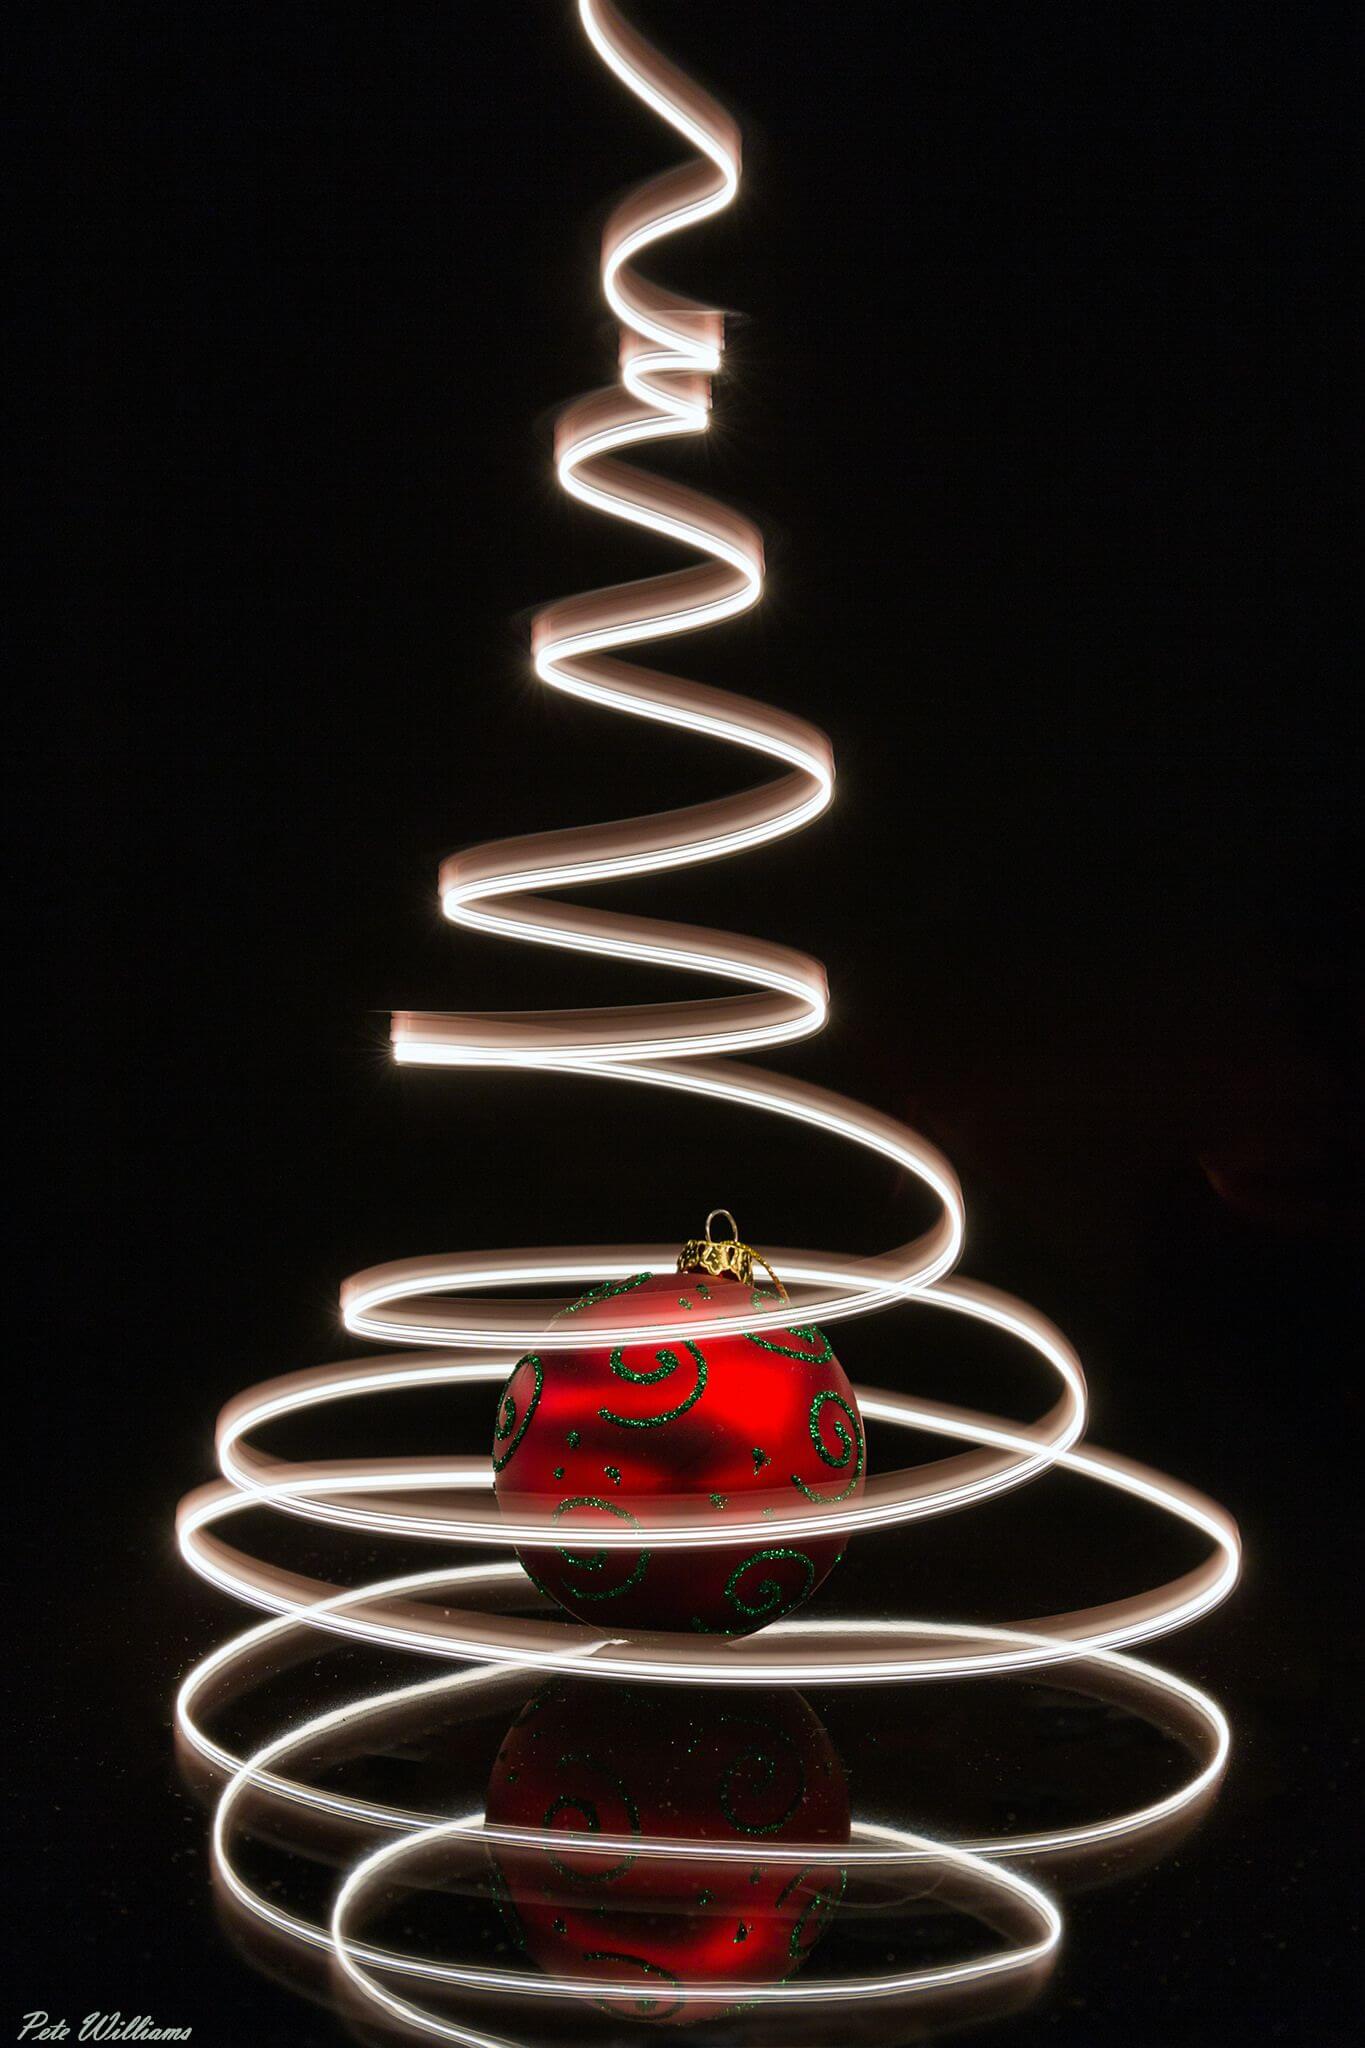
4.) Below are a few examples of my light paintings. In order to create these images, I used a Canon 5D Mark II with a 50mm prime lens, 3 light sources, and gray background. I used the following shutter speeds:
1 second – This is what gives you the “trail” effect in the image. As you can tell, it doesn’t really look like anything yet! (Lost in This World)
5-10 seconds – At 5 seconds you can see some faint tree-like shapes starting to appear. At 10 seconds, I can really see some cool shapes forming. (Lost in This World)
15-25 seconds – This is where things get really fun. The longer you leave it open, the more intricate your light painting will become. The more light sources you use the better, but be careful and watch out for hot spots and hot pixels (they look like white dots). (La la la la la la)
HOW TO AVOID HOT PIXELS AND HOT SPOTS
You can buy a cheap snoot that goes over your flash and redirects the light beam, but keep in mind that you’ll need to go shorter than I did. Try not to block any of your flash heads with your fingers. If you do, adjust the intensity of your flash (increase or decrease it as needed until you can see where it’s hitting).
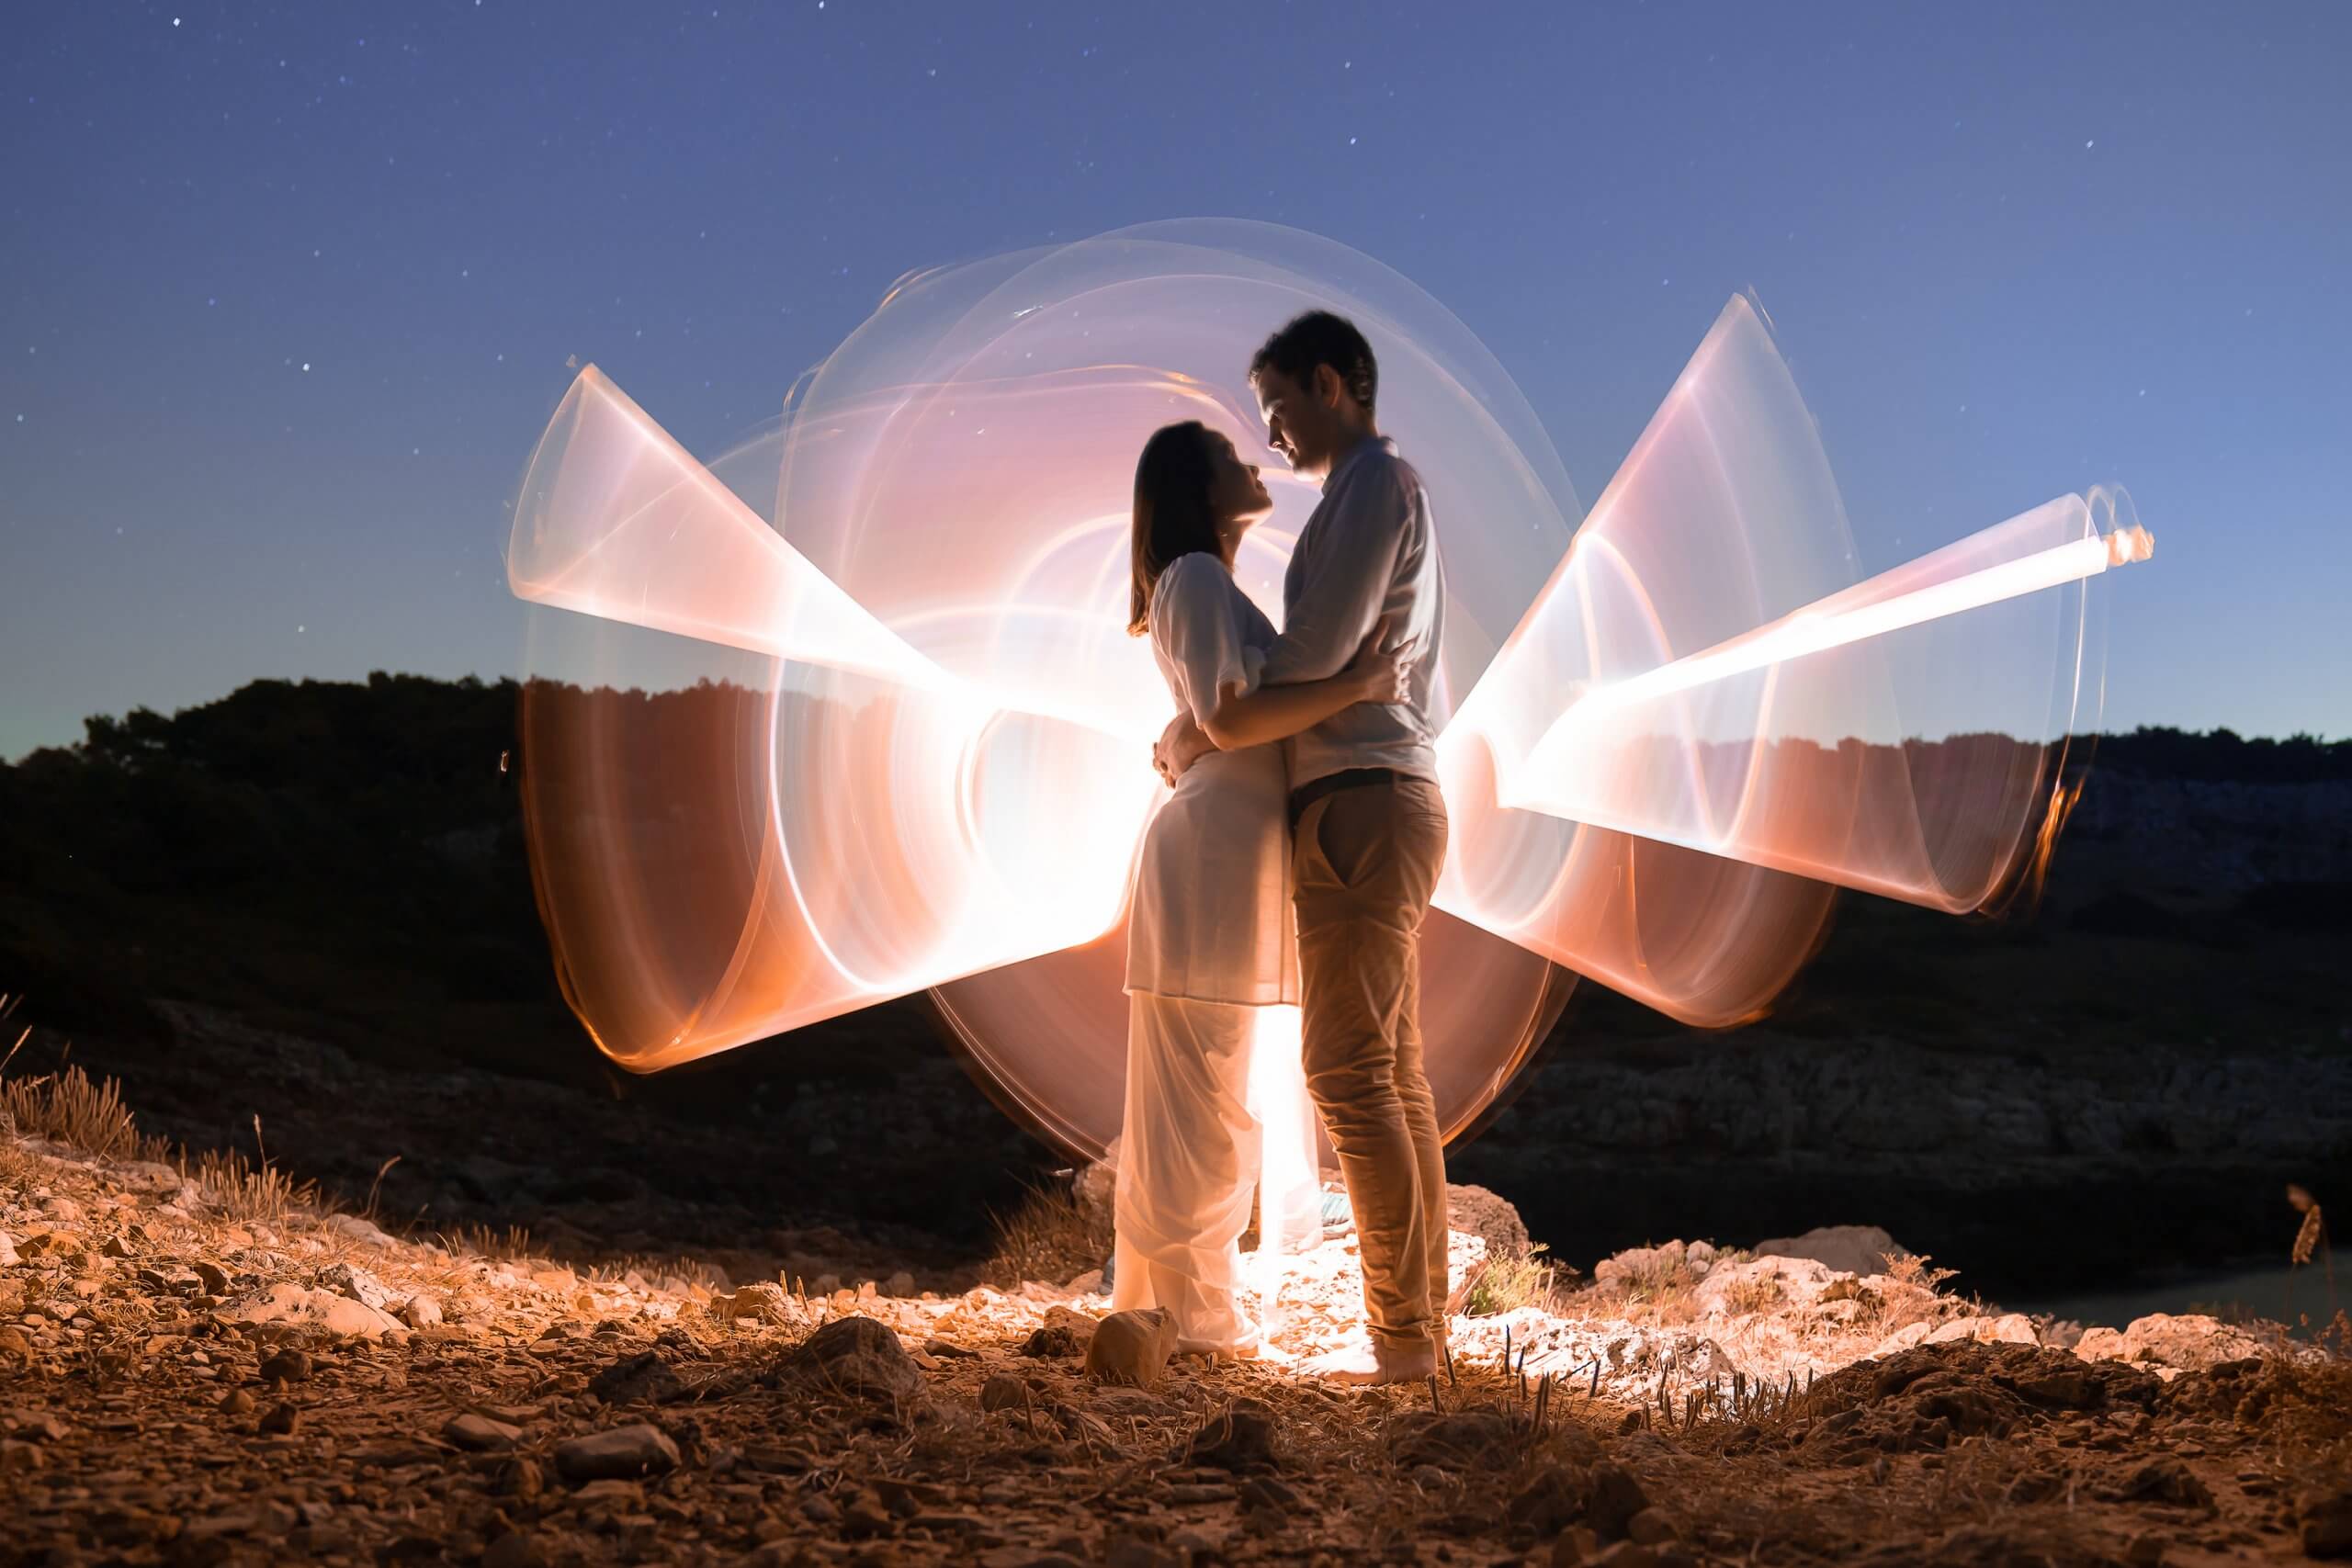
Use multiple speedlights – This is what made this image look so cool! I used 2 speedlights and a single strobe for this shot (below). You’ll be able to get much better results than if you were trying to use just one.
Use slower shutter speeds (up to 30 seconds) – You can get nice exposure with faster shutter speeds but the longer your exposure is open the more detail you’ll be able to get in your image. Notice how there are more hot spots in this exposure than in my others. (High Res)
Use multiple light sources (maximum 4) – You will need to burn cooler lights into your photos otherwise it’s too bright and over exposed. The more light sources you use the better the exposure will look, but remember that hot spots are hard to avoid when using multiple speedlights!
Use a gray or other non-reflective background – This will give you the ability to see your photos as they’re being developed. It’s really helpful to compare what you’re seeing on screen to what you’re seeing in real time.
Take multiple photos at different exposure levels (up to 1 second) – The photo above was taken 10 seconds, then I took another one 30 seconds later, and then another one after that for a total of 5 minutes of light painting.
BEST WAY TO START OUT
Start simple – Rather than trying to light paint an image on its own, try incorporating light painting into a landscape or objects first. This is a great way to practice basic exposure and camera movements without having to worry about too many other things!
Use multiple speedlights and diffusers on one subject – Not all of us have giant warehouses available for our photo sessions, so we’ll have to adjust the brightness of our lights on the fly! The more lights you use, the more control you’ll have on how bright each part of your image turns out. Here’s what my setup looked like for this shot:
Do your research – I’ve found that cool and interesting lights and backgrounds really bring life to the scene in photos. The more you explore this subject matter, the more you’ll learn about what makes good subjects for light painting.
Experiment – Light painting is an exercise in patience and experimentation. Expect to make some mistakes and learn from them. If you’ve got a solid foundation of experimentation and practice under your belt, you’ll be on the road to light painting mastery in no time!
1 thought on “Light Painting Photography”